
SPG-2.
General info:
The gearbox is
designed for 4-stroke auto engine conversions up to 140HP and using them with
propeller for NOT SERTIFIED experimental
light aircrafts, hovercrafts, airboats etc. It can be used for tractor and
pusher layouts. TBO is about 1000 hours. It is recommended to check and
possibly change bearings and rubber dampener after 1000 running hours.
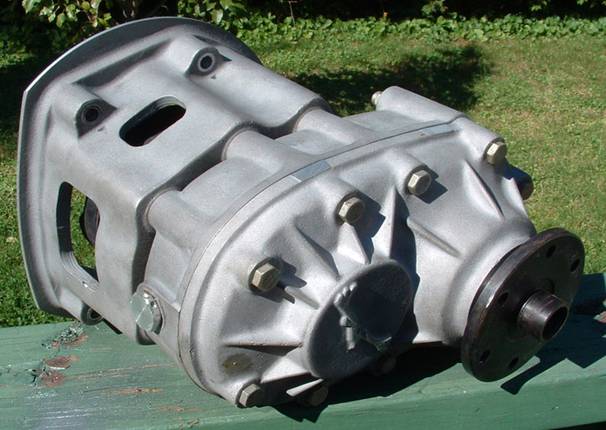
The gearbox
set consists of 3 main parts bolted together:
1) Gearbox with gears and oil inside.
2) Damper housing with BMW damper
3) Bellhousing (different for different engines)
Assembling and installation info:
Assembling and installation on the
engine is quite simple procedure. No necessity to modify your engine to install
the gearbox. Look at our step-by-step pictures below. E-mail Air Trikes l
if you are not sure how to assemble it even after seeing them. Some important
notes:
1)
Some
engine components can be different. For example, there are 2 different types of
starter flywheels + automatic flex plate for Suzuki-GEO engines. It is possible
to use a “flexplate sandwich” (2 flexplates
bolted together) for more smooth than with a singe flexplate
running. It is also possible to use a custom made flywheels. We supply a
“universal” coupler which can be used with all of them but you have to modify
your flywheel or make a simple spacer for your flexplate
to fit them to the coupler. We supply drawings if necessary.
2)
The SPG-2
manufacturer don’t supply crankshaft, bellhousing and
starter bolts because they are different for different engines. We are going to
supply them for GEO, with other necessary bolts (for motormount
L-bars for example) soon. List of necessary bolts for GEO-Suzuki:
M10 x 1.25 L30 – 6 (crank)
preferably with 14mm head
M10 x 1.25
L35-40 – 1
M10 x 1.25
L45-50 – 1
M10 L55 with lock nuts – 2
M8 x 1.25 L 45-50 – 2 (starter)
You can buy them (at least 8.8 grade) in a local hardware store. Metric bolts are not
common in
3)
Torque
crank bolts sequentially with 5 ft. lb. increments to 29 ft lb.
Torque 6 rubber damper bolts to 22 ft lb. Use blue locktite
to secure all bolts even if locknuts are used.
Gearbox break-in:
Must be done with a propeller.
1)
Fill the gearbox with gear oil 75W90
or 85W140 70ml more than the level of the side plug.
2)
Start the engine. Run it from idle, slowly increasing RPM up to MAX for one
hour.
3)
Stop the engine, pour the oil out, clean the gearbox
inside with kerosene (diesel oil).
4)
Fill the gearbox with fresh gear oil 75W90 or 85W140 again 70ml more than the
level of the side plug. Install security wire to each plug
Gearbox maintenance:
Check
the gearbox visually during preflight outside (oil leak, cracks, safety wires) and
inside through the windows (rubber damper, crank and damper bolts, cracks of
the shafts).
Change
the gear oil each 50 running hours or one year.
We
don’t recommend to open the gearbox if there is no
strong necessity for it. It is quite easy to damage seals or other parts during
incorrect disassembling and reassembling. Allow the manufacturer or “Air Trikes” to do it if necessary.
Recommended propellers for Suzuki-GEO engines
with SPG-2:
|
Engine |
Reduction Ratio |
KOOLprop model |
|
G10 carb and TBI |
2.34 |
63” |
|
G10 carb and TBI |
2.5 |
63” 67” |
|
G10 TBI “Sport” |
2.5 |
67” 69”Light |
|
G10 Turbo |
2.34 |
67” |
|
G10 Turbo |
2.5 |
69”Light |
|
G13 BA |
2.34-2.5 |
67” 69”Light |
|
G13 BB |
2.34-2.5 |
69” Heavy |
|
G13 GTI |
2.34-2.5 |
69” Heavy 73” |
.
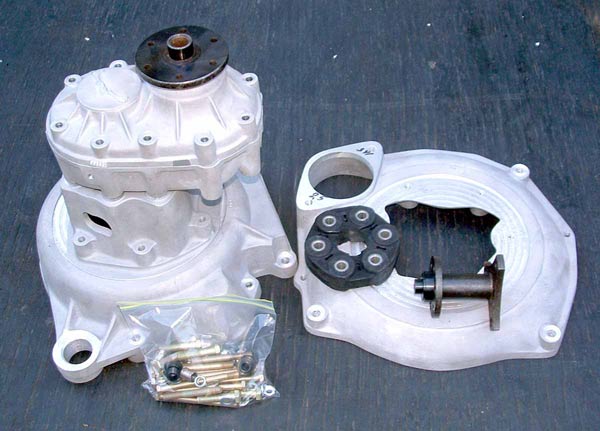
SPG-2 with bellhousings
for Suzuki and Subaru

SPG-2 disassembled, special order
gearbox with Rotax 912 hub assembled.
Gearbox
installation (mechanical part of the conversion)
Main steps:
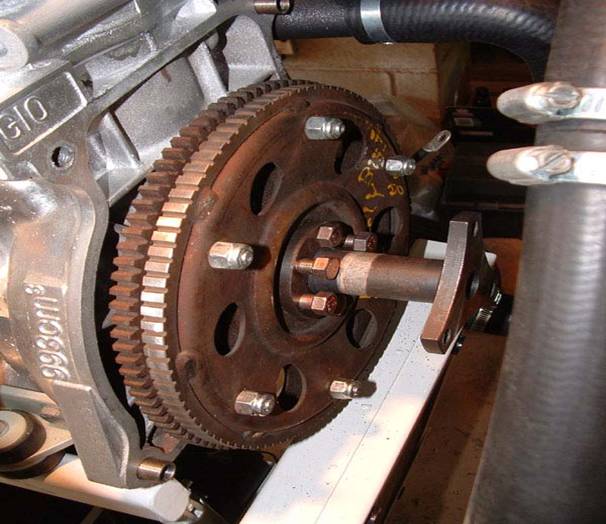
Flexpate
“sandwich” and coupler installation
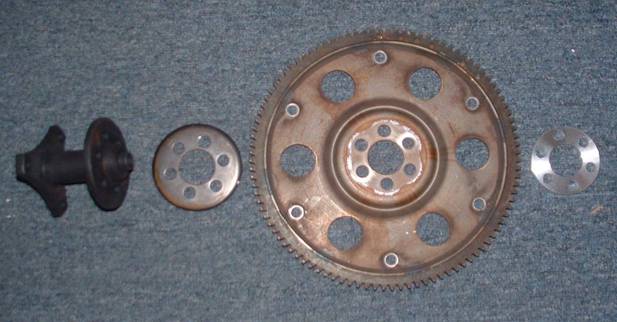
Parts used for single flexplate installation (in order as they go)
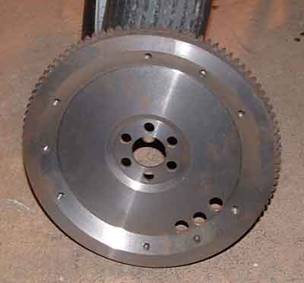
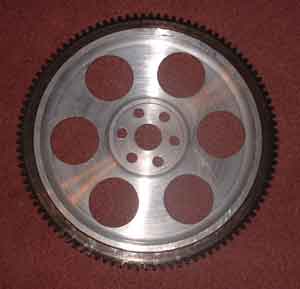
Machined standard flywheel or
aluminum custom made one can be used as well.
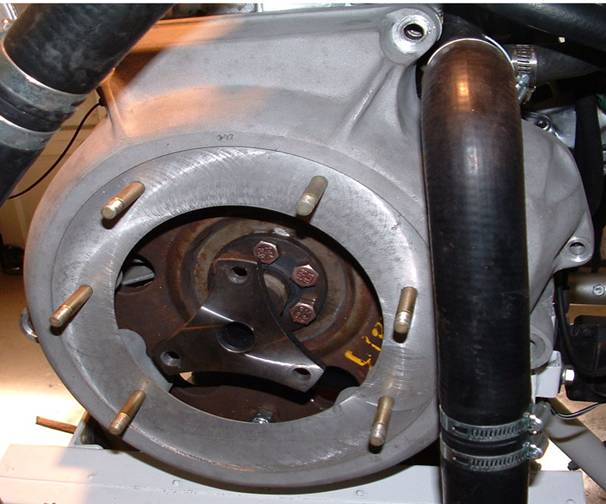
Bellhousing
installation (bolts can be used instead of studs)
Gearbox and damper housing bolted
together
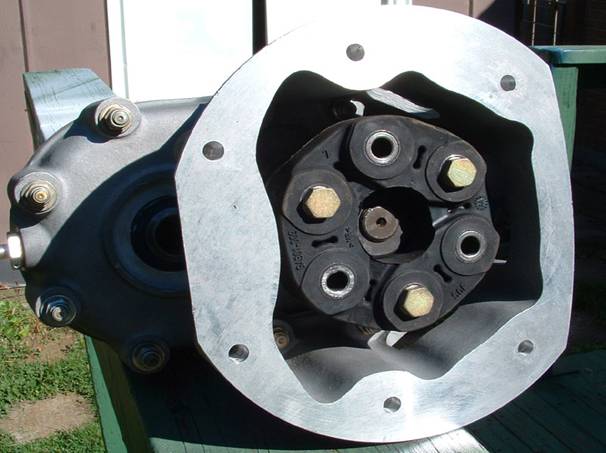
Damper installation
Next
step – internal and external dimension chain verification. I recommend trying to install the gearbox on
the bellhousing to estimate the dimension between the coupler
and the rubber damper. It has to be 0 +/- 1mm (recommended 0 +/- 0.5mm)
If it is more, thin spacers
between the damper and the gearbox triangle have to be installed, but not more
than 4mm. If it is less (gap between bellhousing and damper housing more than 1mm), I recommend
to remove the steel crank coupler spacer.
When the dimension between the coupler and the rubber damper is
OK, torque stud nuts (or bolts)

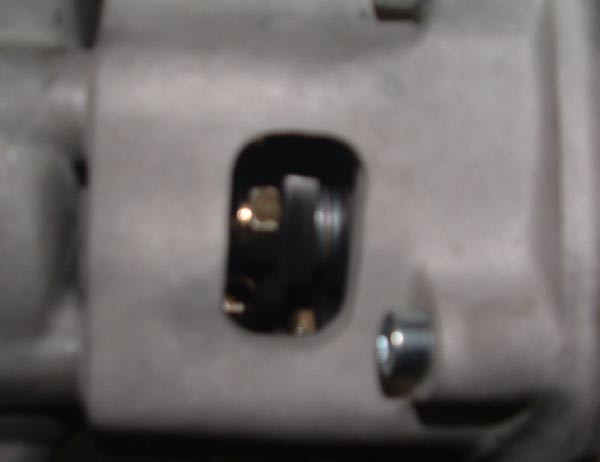
14mm special wrench - good help!
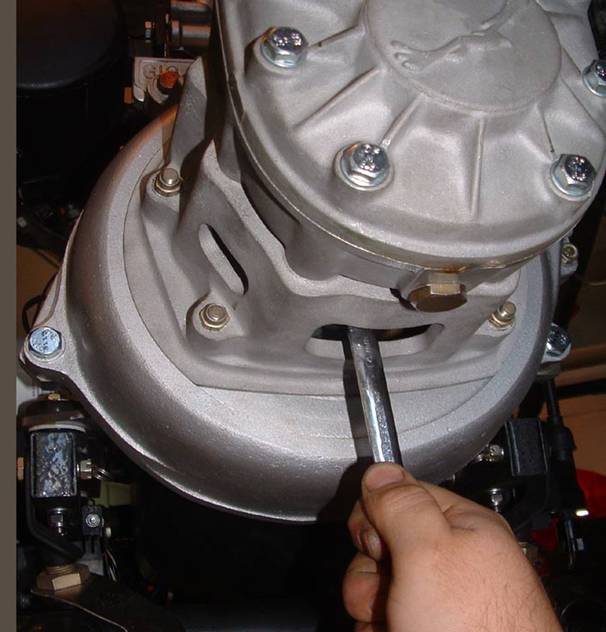
And
how we use it to install 3 other damper bolts.
Torque them properly, don’t forget Locktite!
Then starter,
and we are done!
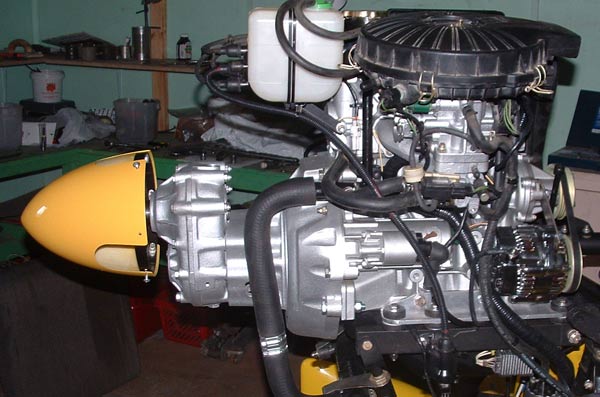
As you can see – nothing difficult. All mechanical part of the conversion could be done for about half a
day. The same way it can be installed to Suzuki G13, Subaru, Honda, Nissan
engines.
Available
options:
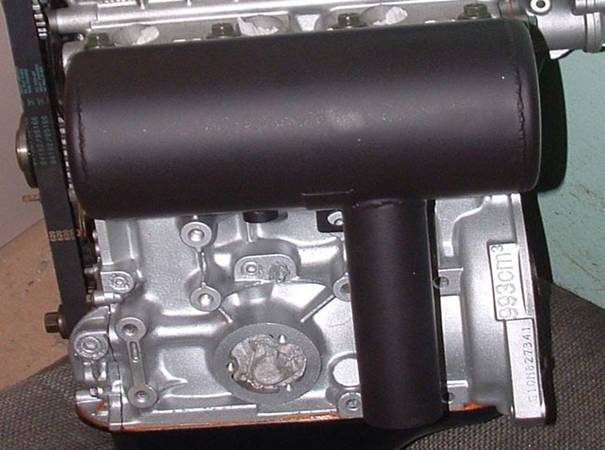
Canister-type muffler
1)Set of 3
light aluminum hard anodized pulleys. The alternator pulley is the same
diameter as other pulleys
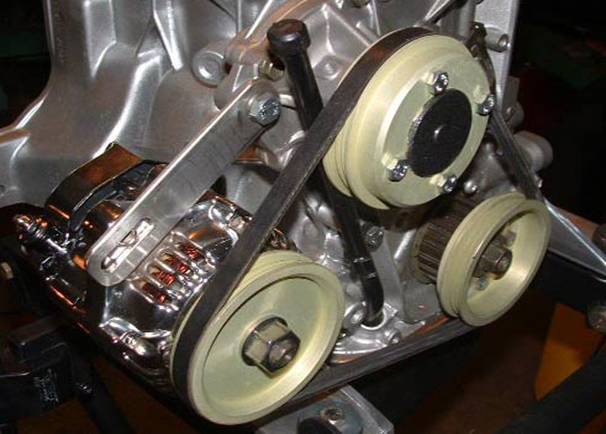
2) Light alternator with installation bracket.
About 2lb lighter than the lightest standard GEO alternator with its bracket.
Motormount L-bars (2, each side) with 6 Barry-mounts.
Other options, the same as ready-to-install
engines are available.
If you have
any questions - contact Air Trikes Enterprises.
E-mail: info@airtrikes.net Phone number: (514) 685-2656 Website www.airtrikes.net